

This page is split into collapsible sections to help you navigate to the most useful aspects of your rehabilitation programme.
This section covers an explanation of the diagnosis, what's going on within the body, and potential reasons that may have caused the issue in the first place. It gives some context, and helps explain the mechanisms at play, discussing possible lifestyle adjustments to prevent it from coming back.
Each programme is broken down into phases based on where you are in your recovery. Exercise videos will progress from initial, light exercises following injury, to more difficult, strength training as you recover. Within each phase are further drop downs, providing additional information about the phase and other interventions you could try.
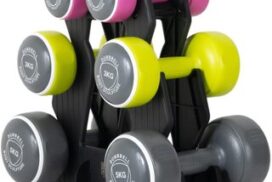
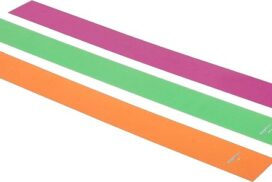
Any equipment listed within the programme is linked within this section. We have hand selected our preferred suppliers of all equipment needed, with links on where to purchase each item; providing a low-cost, quality product to make purchasing online quick and easy.
Following a specific event which resulted in shoulder pain, with associated loss in range which improves with general mobility, you may simply have shoulder joint stiffness. From the tests you performed at the start it doesn’t appear that any loss in neck range is affecting your shoulder symptoms which is encouraging.
This condition can be called something different depending on the classification system certain therapists use. However the basis is the same, that ultimately as a result of the trauma or injury your shoulder isn’t moving as well as it did before, but this will resolve with some simple exercises.
It is not uncommon following trauma that your shoulder has general stiffness in its movement, and encouragingly it responded well with simply repeated mobility exercises. The aim of the treatment initially is to restore the shoulder to full range of movement, allow any damaged soft tissue some time to repair itself by avoiding any unnecessary aggravating factors, and then slowly build back up the strength to its pre-injury level. You can sometimes be restricted in just one movement direction such as extension, or may in fact be restricted in multiple such as extension and internal rotation. You may find it helpful during the programme to focus on the specific movement you are restricted in, and it appears initially for you it may be into extension.
The vast majority of shoulder joint pain caused by stiffness generally recovers well, but the key is to ensure that full range of the shoulder is achieved in all directions. ion.
Phase 1 (first 24-72 hours)
| Exercise | Reps / Sets | Freq |
| Elbow Flexion and Extension Range of Movement | 30 seconds x 2 sets | 5 x daily |
| Neck Active Range of Movement | 30 seconds x 2 sets | 5 x daily |
| Shoulder Pendulum Exercise | 30 seconds x 2 sets | 5 x daily |
This phase is normally the first 24-72 hours after the injury and its aim is to settle any swelling and pain whilst maintaining the range of motion and function you have.
In the initial phase the use of over the counter medication may be an option. Medications such as simple pain relief and anti-inflammatories may allow the condition to be more manageable. Please consult your family doctor if you have any concerns with this impacting your current medication, or if any medical history may be impacted by the option of including this medication.
The focus on the exercises is to maintain the movement of your neck and elbow, and introduce a low level shoulder mobility exercise.
With shoulder pain, it’s quite common to try and protect the injured area, with the muscles surrounding the joint to tighten up as you are guarding it against any further damage. This can result in further discomfort, specifically neck and elbow pain.
Some things to consider with the exercises:
Phase 2 (first 2-4 weeks)
| Exercise | Reps / Sets | Freq |
| Shoulder Extension Mobility | 30-60 seconds x 2 sets | 2 x daily |
| Shoulder Internal Rotation Mobility | 30-60 seconds x 2 sets | 2 x daily |
| Shoulder External Rotation Mobility | 30-60 seconds x 2 sets | 2 x daily |
| Shoulder Flexion Wall Climbs | 30-60 seconds x 2 sets | 2 x daily |
This phase we are looking at focusing on shoulder mobility exercises. This will be roughly the first 2-4 weeks of your rehab.
The exercises in this phase are designed to address the three movements of the shoulder joint which often get neglected when there has been an injury. The movements are internal and external rotation, and extension.
Generally with shoulder pain you can irritate things when trying to perform basic movements for generally daily activities. For example putting on your jacket, reaching behind you in the car, tucking in a shirt or putting a bra on. All of these movements, and those similar to it, do not require your arm to move upwards or forward. But instead it’s the ability of your arm to move backwards into extension, combined with an element of rotation. Following an injury it’s quite common for you to guard movement initially as it’s painful, but over time this can cause a restriction in movement. Couple this with any soft tissue damage which would have occurred, the result are certain positions and movements which become tight or restricted.
The aim for these first few weeks is to make sure we gain full movement of extension along with internal and lateral rotation. By increasing the range of these movements you should find that you don’t cause pain in your shoulder as frequently when performing daily tasks, and your overall symptoms and function will improve. Focusing purely on how high you can move your arm into flexion with your hand above your head, and not addressing restrictions in these other movements, will most likely cause your symptoms to linger and difficulty performing tasks such as putting on your jacket, tucking your shirt in or doing up your bra.
The timelines here are merely a guide and you may find you can progress from this phase before 2 weeks, but equally it may take longer than 4 weeks, and this will depend on the level of restriction and the amount of soft tissue damage caused. A good marker on when to progress to Phase 3 is when you can move your arm backwards into extension to the same range on both sides, you can bring your hand up behind your back to the same level on both sides, and when you rotate your arm outwards it’s the same range. Doing these movements in front of a mirror, or getting someone to view you doing the movements, is a good way to check if they are the same on both sides.
You may find you want to continue the exercises from Phase 1 into this phase as well, which is absolutely fine, but they will have less benefit as the weeks progress.
There will be some movements which you find easy and may even offer some relief in the discomfort you are experiencing, others may be more challenging. You may also find it helpful to offer some variety on the angle you perform these exercises as it may make things a little easier. The point here is there is no set way to perform mobility exercises, and no two days will be the same. Don’t get discouraged by this and just make sure that you get something done at least once a day.
These movements shouldn’t cause any spike in pain, but a little bit of discomfort is expected as you move into the restricted range.
The aim of these exercises is to offer some basic mobility to the shoulder without increasing your pain. Remember to start off easy and only increase the range after performing a few reps of each movement as a warm up.
Some things to consider with the exercises:
During this phase your symptoms whilst resting should start to settle and generally you will only find an increase in pain when performing movements which are restricted. You will also notice that general daily activities which were once limited, will slowly become a little easier.
Phase 3 (4-8 weeks)
| Exercise | Reps / Sets | Freq |
| Shoulder Flexion Mobility | 12-15 reps x 3 sets | 2 x daily |
| Resistance Band Row | 12-15 reps x 3 sets | 2 x daily |
| Resistance Band Internal and External Rotation | 12-15 reps x 3 sets | 2 x daily |
| Resistance band shoulder flexion | 12-15 reps x 3 sets | 2 x daily |
This phase will be roughly 4 weeks from the start of your rehab and its aim is to build on the increased range from Phase 2 whilst adding in some basic strength work.
A good marker on when to progress onto this phase is when your mobility for extension, and the rotational movements are the same on both sides. We would not expect all movements to be completely pain free at this stage, but general daily activities should be easier. After a period of reduced activity due to the pain you have been experiencing, you would expect there to be a general loss in strength in your shoulder. We will in this phase be reintroducing some basic strength work to help address any weakness.
You can continue the mobility exercises from Phase 2 still, especially if any of the movements offer relief.
You should continue the mobility exercises from Phase 2 for 1 set, and perform these exercises after them.
Some things to consider with the exercises:
Kinesiology strapping is very popular for many musculoskeletal injuries. The idea is that the tape helps support the muscles and tendons at the point of pain, and therefore causes less pain when doing exercises or general daily activities. The evidence for kinesiology strapping is mixed, and because of that some people find it’s really helpful whereas others find it doesn’t offer them much at all.
If you feel you are struggling to progress, or you feel your rehab is a little stagnant, or that general daily activities are still irritable, then it may be helpful to try this.
You can leave the tape on for up to 5-7 days but at any point if it feels hot and itchy take it off straight away. Have a day’s rest of no tape before reapplying, and ideally test with a small strip before applying a big amount to you.
This video shows a general strapping method which you may find helpful in offering some support of the shoulder muscles which may make daily activities and these new exercises less painful.
It’s likely that used alongside some of the other treatment methods it may offer some relief, but realistically on its own will not help completely alleviate your pain.
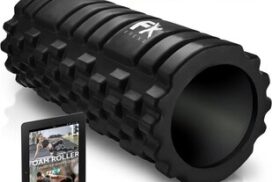
A foam roller is used to offer self massage. They are marketed as a way to get similar results of a massage but without the reliance of a masseuse, making it more practical and cheaper for people to use. They are very popular within the fitness industry and with a lot of professional athletes using them within their warm-up and rehab routines. The idea is that similar to massages they increase blood flow to the area and also help with mobility by reducing muscle tension. Unfortunately the evidence on them having an effect on muscle length is minimal, and any change is short term, and the link that they reduce injury or improve rehab times is simply missing. Used alongside an exercise programme it can help with symptoms and function, but used on its own it will not improve performance. In this example you would be foam rolling the large back muscles specifically the lats with the aim to reduce the tension of these larger superficial muscles which may make arm movement easier. Do not foam roller over the injury site on your shoulder as this will be painful and likely delay the healing of the muscles.
At this stage you should find you can do more day-to-day activities pain free. The temptation here is to go a bit overboard. A nice reminder to pace activities so that you don’t over do it, and that you spread these activities out as much as possible throughout the day.
Phase 4 (8+ weeks)
| Exercise | Reps / Sets | Freq |
| Resistance Band External Rotation at 90 Degrees | 12-15 reps x 4 sets | 2 x daily |
| Resistance Band Internal Rotation at 90 Degrees | 12-15 reps x 4 sets | 2 x daily |
| Resistance band Abduction | 12-15 reps x 4 sets | 2 x daily |
| Resistance band shoulder press | 12-15 reps x 4 sets | 2 x daily |
This phase would be roughly 8 weeks from the initial injury.
This phase may not be appropriate for everyone and if you can perform all your daily activities pain free and have no intention of returning to sport, you can stop at Phase 3. However after a period of reduced activity you would expect your general strength in your upper body to be reduced, so it may help with certain activities you are struggling with.
If you intend to return to sport, especially one which requires an element of upper body strength such as racquet or contact sports, you should continue with these exercises.
Similar to Phase 3 the timelines here are merely a guideline and may vary. You may find that you are able to start this phase before 8 weeks if the symptoms have settled and you aren’t challenged by the exercises.
You should continue the mobility exercises from Phase 2 and 3, with the aim to maintain full range of motion. However you would not necessarily need to do as many sets as you previously did, and you may not need to do all the mobility movements every day, you could potentially alternate which days you perform certain movements.
The aim in this phase is to increase the strengthening exercises through range.
You should continue the mobility exercises from Phase 2 and 3, and you can use the strength exercises from Phase 3 as a warm up before attempting these new exercises.
The focus of these exercises is to further challenge the strength of the shoulder muscles through a greater range, and introduce some strength work with your arms above your head.
Some points to consider with the exercises.
Depending on your sport or activity of choice, you may want to perform some upper body weight bearing exercises such as a plank or press ups. It may also be suitable to do higher level dumbbell strengthening exercises to further increase your strength.
As a general rule, try and aim for two pain-free training sessions at a reduced duration or intensity before increasing.
For example, if you normally play 60 minutes of tennis, aim to play for 30 minutes in a non-competitive environment for two non-consecutive days.
Having a day’s rest between sessions allows you to have appropriate rest and for your body to repair and become stronger.
Once you have found a duration or intensity you can tolerate with no flare up, aim to increase the next session by 10%. This can seem like a slow and conservative process however the research has shown this is the optimum level of increase to avoid an overuse injury. Increasing duration or intensity by more than 10% significantly increases your chance of injury, so only increase one or the other by this amount. As you will have been away from your sport for a number of months, you will have lost some of your fitness conditioning in this time and will need to build up slowly.
Over time you will be able to slowly return to your pre-injury level of activity without regressing back to any acute flare-up.
Before printing or downloading your programme, expand all of the drop down sections that you’d like to capture within your downloaded Full Report. Any sections that are closed will not be downloaded.
The button below will open a print window. Simply save the page as a PDF to have your offline full report, anytime.
Many of the tools including our Symptom Checker, Programme builder and almost 900 rehabilitation programmes are entirely free for anyone to use.
If you’ve found any of these helpful and want to support us keeping them free, consider supporting us.
Enter your email and we’ll send your personalised plan straight to your inbox, so you’ve always got it to hand.
Physiobot is a free digital tool designed to inform, guide, and educate and not a substitute for professional medical advice, diagnosis, or treatment. Always consult a qualified healthcare professional for personal advice regarding your health, diagnosis, or treatment options. By continuing to use this website and the Physiobot tools, you agree to our Terms of use.