Full Report
Welcome to your free report covering the diagnosis, management and treatment options, exercises and equipment that could help in rehabilitation. Scroll down to read more or use the sidebar icons to skip ahead.
Diagnosis
Acromioclavicular Joint (ACJ) Sprain
When you have fallen onto your shoulder with your arm tucked into your side you may have suffered an acromioclavicular joint (ACJ) sprain. The ACJ is a joint on the top of your shoulder and involves your clavicular, the collarbone, and your scapula, the shoulder blade. This joint is given its stability by a collection of ligaments, which attach from bone to bone. The function of the ACJ is to help with arm movements and also absorb forces from the upper arm to the rest of the skeleton. When you fall onto your shoulder the force travels through this joint causing some damage.
Generally this joint and the ligaments are injured when a force is put through the ligaments which is too great to what it can handle. You normally end up with swelling over the top of the joint, pain when laying on your side, or when the joint is touched, or with any arm movements above your head. A sprain is when there a small tears in the ligaments of the joint, but the ligaments are still in tact, and these small tears will repair over time.
Depending on the level of force these injuries tend not to need further investigation initially, but you should be assessed by your family doctor or a medical professional to determine if you would need an X-ray to rule out any fracture which may have occurred. The mechanism of injury and elements of an ACJ sprain can be similar to when someone fractures their collarbone. Whilst you are waiting for this appointment you can start on Phase 1 of this programme, once you have been assessed and they conclude it is an ACJ sprain you can continue throughout the rest of the programme.
The initial management of an ACJ sprain is to offer it some protection and support, whilst avoiding activities or movement which cause it pain. This will allow the sprain time to heal and for your symptoms to settle. As the pain reduces you can then start focusing on increasing your range of movement and introduce some strength work as well. Most ACJ sprains progress well with a full return to sport and activity.
There are occasions where the level of force for this injury is so great that it causes a dislocation in the joint, and in these scenarios the Orthopaedic team will be able to guide you on the best course of action following your assessment with your Family Doctor or Medical Professional.
Management
Click each phase heading to see the progression of your management programme.
This phase is normally the first 24-72 hours after the trauma and its aim is to settle any swelling and pain whilst maintaining the range of motion and function you have.

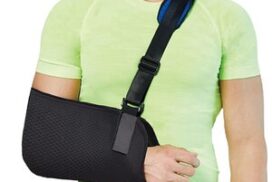
Sling
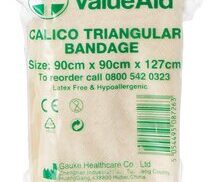
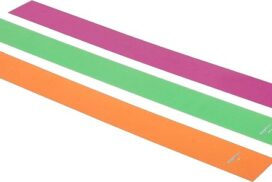
Initially you may find the use of a sling helpful in reducing the pressure on the ACJ due to the weight of your arm. A basic fabric triangular sling would be appropriate short term but you may find one made with foam padding more comfortable.

Assessment
You should arrange an appointment with your Family Doctor or another Medical Professional who will be able to assess if you require an X-ray. You can continue with Phase 1 whilst you are waiting for this appointment and the X-ray result. If they determine that you do not require an X-ray you can continue with the entire programme.
RICE
RICE stands for Rest, Ice, Compression and Elevation. These steps are helpful for when you have an injury in the acute phase to help reduce pain and assist with the healing process.
Rest: You need to reduce the activity level you are performing to let your body have time to heal and to ensure you don’t cause any further damage. The aim here is to pace your activities throughout the day and cut back on anything unnecessary or that particularly increases your symptoms. Using a sling will help ensure you don’t do anything unnecessary with your arm and offload the weight of your arm on the ACJ.
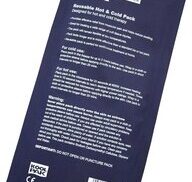
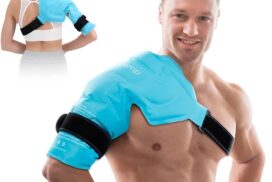
Ice: This can help reduce the pain you are experiencing and also reduce some of the swelling if you have any. Using some frozen peas wrapped in a damp cloth for 20 minutes will work well here and do this every hour or two. Do not apply the ice directly to your skin, make sure you have a barrier which is preferably damp, and keep an eye out for any ice burns onto the skin. If you notice this stop immediately.
What can be helpful here is having a specifically designed ice pack you can reuse over and over again. You may still need to have that damp cloth as a barrier with these packs as well.
Compression: This relates to the use of the ice being compressed onto the shoulder. This can be achieved by simply wrapping a cloth around your shoulder, but more bespoke equipment offers this ability which would be more comfortable and effective, such as a shoulder ice pack. However you may find this element irritable on the top of your shoulder.
Elevation: Compared to other joints such as your elbow or wrist, applying the principle of elevation to your shoulder occurs almost naturally. Having your shoulder resting higher than your heart, such as in sitting or upright laying, will help drain any swelling you have in your shoulder joint. However as you spend most of your day with your shoulder above your heart, it is naturally draining throughout the day already.
Medication
In the initial phase the use of over the counter medication may be an option. Medications such as simple pain relief and anti-inflammatories may allow this acute phase to be more manageable. Please consult your family doctor if you have any concerns with this impacting your current medication, or if any medical history may be impacted by the option of including this medication.
Exercises
The focus on the exercises until you have the results of the X-ray is to simply maintain the movement in your neck, elbow and wrist so they don’t get stiff.
With a shoulder injury it's quite common to try and protect it, with the muscles surrounding the joint to tighten up as you are guarding it against any further damage. This can result in further discomfort, specifically neck and elbow pain.
| Exercise | Frequency | |
| Elbow Flexion and Extension Range of Movement | 30 seconds x 2 sets | 5 x daily |
| Pronation and Supination Range of Movement | 30 seconds x 2 sets | 5 x daily |
| Wrist and Neck Active Range of Movement | 30 seconds x 2 sets | 5 x daily |
Some things to consider with the exercises:
- For the exercises of the elbow, make sure you keep your arm supported whilst performing the movements. If these cause any pain then stop performing them until your symptoms improve.
- How long and how often you do the exercises at this stage is not too important. The key is little and often, and as long as you get something done every couple of hours to maintain the range that will be beneficial.
- Listen to your body if it starts to ache throughout the day as you do more, and don’t forget it’s healing so will need time to rest.
- You may find it helpful to do these exercises in a circuit type fashion, where you start off with exercise 1, have a rest, complete exercise 2 followed by a rest, continue this pattern until you complete all the exercises, and then restart.
This would be roughly the first 2-4 weeks of your recovery and only to be started after you have been assessed by your Family Doctor or Medical Professional.

Education
You may find you want to continue the advice from Phase 1 into this phase as well, which is absolutely fine. During this period the main focus is reducing your pain levels throughout the day which will hopefully ensure that your sleep is not disturbed. Using the sling will help continue to offer support and should also reduce the pain levels in your shoulder, but you should start gradually weaning the use of the sling during this phase. If you stop using the sling too early or for periods which are too long and you experience an increase in pain, simply put the sling back on and shorten the length of time out of the sling in the future.
During this phase the ligaments which have been sprained will be repairing themselves and you will notice your pain levels reducing, and your general activity throughout the day also improving. You will probably find that you can perform tasks where your arm is kept by your side and your hands are in front of you, and this is absolutely fine to continue these types of activities. You will also find during this phase you can start to lay on that side without it being painful, but this may take a few weeks depending on the level of injury.
Exercises
The aim of these exercises is to introduce some basic strength work without increasing your pain. Remember to start off easy and only increase the intensity each week once the symptoms have settled. These exercises do not take your hands above your head, as this will most likely be the most irritable movement whilst the ligaments are still in the early stages of repairing.
| Exercise | Frequency | |
| Isometric Medial and Lateral rotation | 30-60 seconds x 2 sets | 2 x daily |
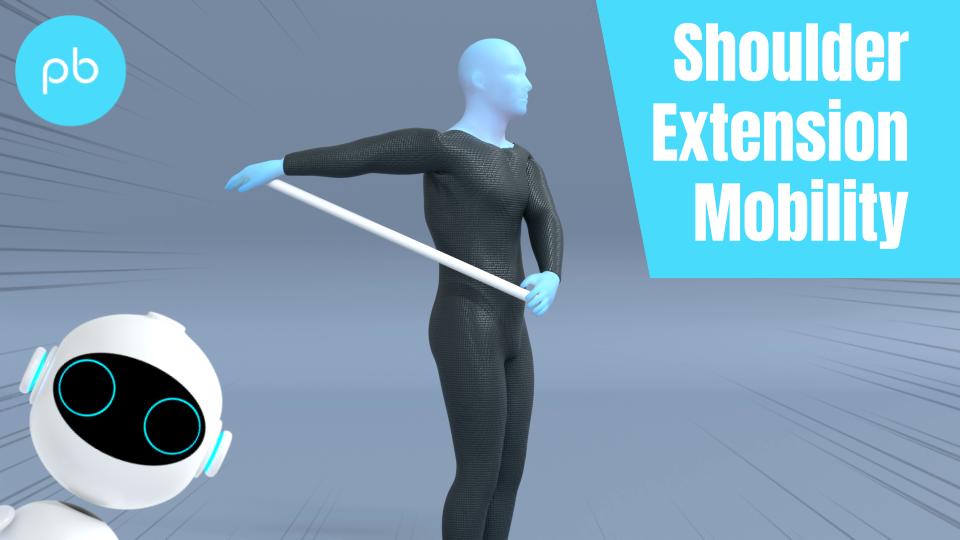
| Shoulder Extension Mobility | 30-60 seconds x 2 sets | 2 x daily |
| Isometric Flexion and Extension | 30-60 seconds x 2 sets | 2 x daily |
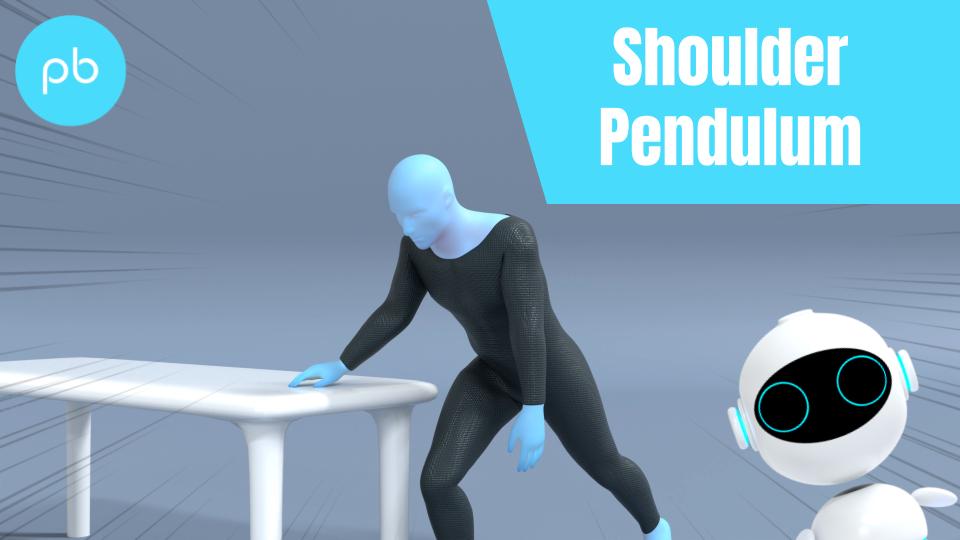
| Shoulder Pendulum Exercise | 30-60 seconds x 2 sets | 2 x daily |
Some things to consider with the exercises:
- For the isometric medial rotation exercise, you can also perform this by keeping your hand on your belly and simply pushing against your belly instead.
- Performing the isometric lateral rotation exercise, you can have your hand closer to your body when you push against the wall, as this may be easier to perform.
- For the extension mobility exercise you can perform this movement without a stick initially, and slowly increase the range in which this is performed.
- The final exercise is a general mobility exercise which may help free up the shoulder movement.
- These exercises should not cause a spike in pain, and any discomfort should reduce after 30 minutes of performing the exercise.
- You may find it helpful to do these exercises in a circuit type fashion, where you start off with exercise 1, have a rest, complete exercise 2 followed by a rest, continue this pattern until you complete all the exercises, and then restart.
Strapping
Kinesiology strapping is very popular for many musculoskeletal injuries. The idea is that the tape helps support the muscles and tendons at the point of pain, and therefore causes less pain when doing exercises or general daily activities. The evidence for kinesiology strapping is mixed, and because of that some people find it’s really helpful whereas others find it doesn’t offer them much at all.
If you feel you are struggling to progress, or you feel your rehab is a little stagnant, or that general daily activities are still irritable, then it may be helpful to try this.
You can leave the tape on for up to 5-7 days but at any point if it feels hot and itchy take it off straight away. Have a day's rest of no tape before reapplying, and ideally test with a small strip before applying a big amount to you.
This video shows a general strapping method which you may find helpful in offering some support of the ACJ which may make daily activities and these new exercises less painful.
It’s likely that used alongside some of the other treatment methods it may offer some relief, but realistically on its own will not help completely alleviate your pain.
Symptoms
During this phase you should start noticing more times in the day when you are pain free, however it is not uncommon for there to be sharp spikes in pain if you are doing a specific activity. This will improve and the activities which cause irritation should become less. If you continue to perform activities which consistently aggravate the shoulder it can potentially delay the healing process.
In this phase we are looking between 4-8 weeks following the injury.
Education
A good marker on when to progress onto this phase is when general daily activities are less irritable, and the exercises from Phase 2 cause no discomfort. You should also at this stage find that laying on your side is pain free. You may still be irritable when you touch the top of your shoulder, this can take some time to fully disappear. Don't repeatedly poke and prod on the top of your shoulder, and even if it is irritable to touch you can still progress to this phase.
The aim in this phase is to re-introduce some flexion movement of the shoulder so we can bring your hand above your head. Initially this may be discomforting to perform so don’t overdo it initially and give yourself enough rest between performing these exercises.
Your ligaments are still healing themselves in this phase so don’t be disheartened if certain activities are irritable, and just listen to your body on what you can and cannot do. As we mentioned at the start the vast majority of ACJ sprains recover well, with appropriate rest and a gradual build up.
The timelines on when to start this phase are merely a guide, and you may find you are able to start earlier if your symptoms have settled quickly and the exercises are not challenging.
Exercises
You can continue the strengthening exercises from Phase 2, and increase the intensity in which they are performed. The main focus on these exercises is to restore the range of movement in your shoulder joint.
| Exercise | Frequency | |
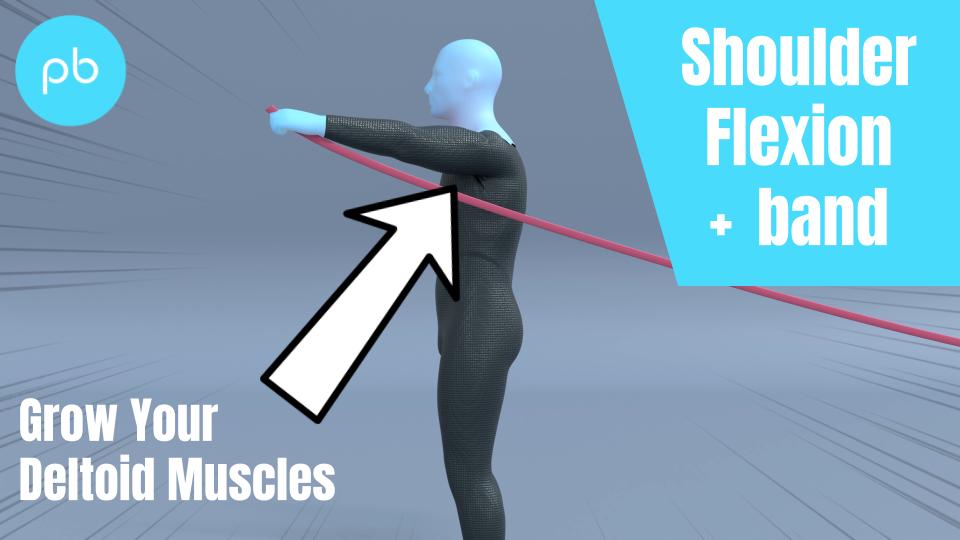
| Resistance band shoulder flexion | 12-15 reps x 4 sets | 2 x daily |
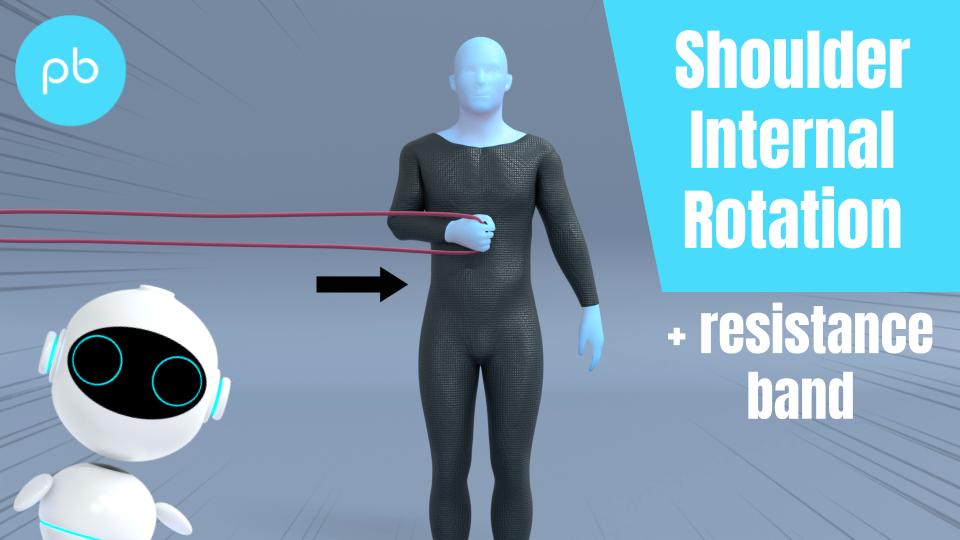
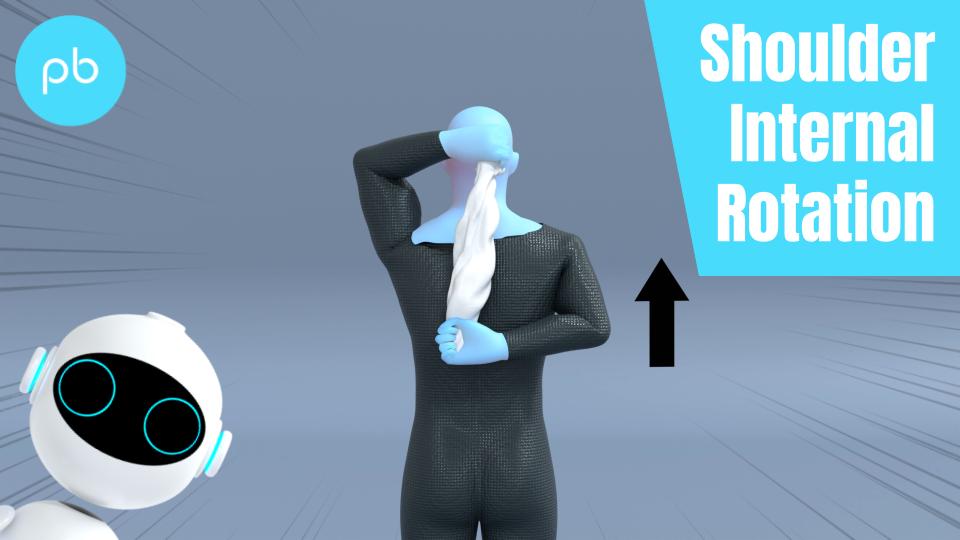
| Shoulder Internal Rotation Mobility | 12-15 reps x 4 sets | 2 x daily |
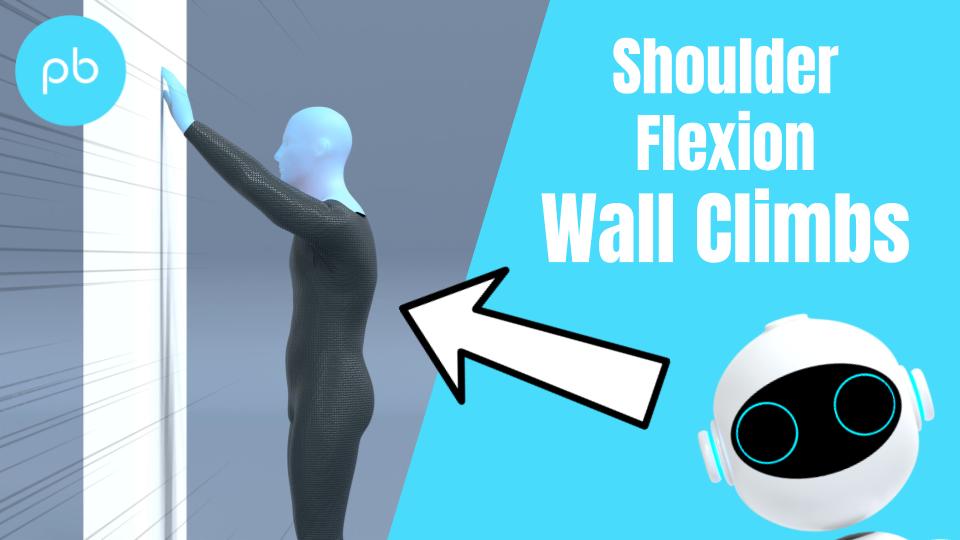
| Shoulder Flexion Wall Climbs | 15-15 reps x 4 sets | 2 x daily |
Some things to consider with the exercises:
- The first exercise is a progression on the isometric exercise from the last phase. Keeping your hand from going above your shoulder will help avoid this exercise being irritable.
- For the internal rotation exercise you don’t have to use a towel, and you may find that initially you do not need to. Start off slow and build up the range of motion over time.
- The final exercise may be the hardest to perform. Progressively build how high you go up and vary the angle in which you have your arm as that may make it easier. Towards the end of this phase you may find that you don’t need the wall and you can bring your arm upwards to full flexion on its own, at this stage it's a good marker you are ready to progress onto Phase 4.
- You may find it helpful to do these exercises in a circuit type fashion, where you do exercise 1 for 1 set, followed by exercise 2 for 1 set, then exercise 3 for 1 set, and then restarting.
Pacing
At this stage you should find you can do more day-to-day activities pain free. The temptation here is to go a bit overboard. A nice reminder to pace activities so that you don’t over do it, and that you spread these activities out as much as possible throughout the day.
This phase would be roughly 8 weeks from the initial injury.
Education
This phase may not be appropriate for everyone and if you can perform all your daily activities pain free and have no intention of returning to sport, you can stop at Phase 3. However after a period of reduced activity you would expect your general strength in your upper body to be reduced, so it may help with certain activities you are struggling with.
If you intend to return to sport, especially one which requires an element of upper body strength such as racquet or contact sports, you should continue with these exercises.
Similar to Phase 3 the timelines here are merely a guideline and may vary. You may find that you are able to start this phase before 8 weeks if the symptoms have settled and you aren’t challenged by the exercises.
You should continue the mobility exercises from Phase 2 and 3, with the aim to maintain full range of motion. The focus in this phase is to increase the strengthening exercises through range.
Exercises
You should continue the strengthening exercises from Phase 2, and increase the intensity in which they are performed. The main focus on these exercises is to restore the range of movement in your shoulder joint whilst under load.
| Exercise | Frequency | |
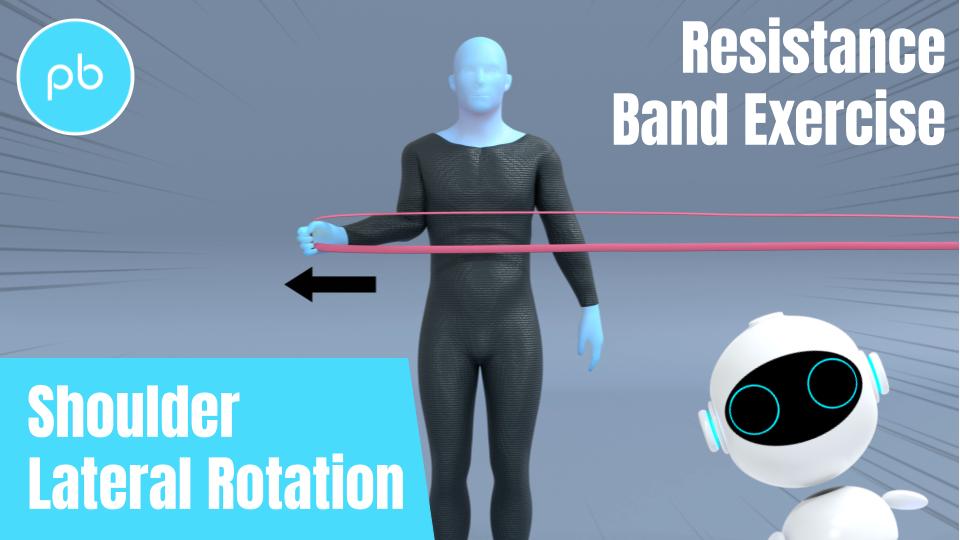
| Resistance band shoulder internal and external rotation | 12-15 reps x 4 sets | 2 x daily |
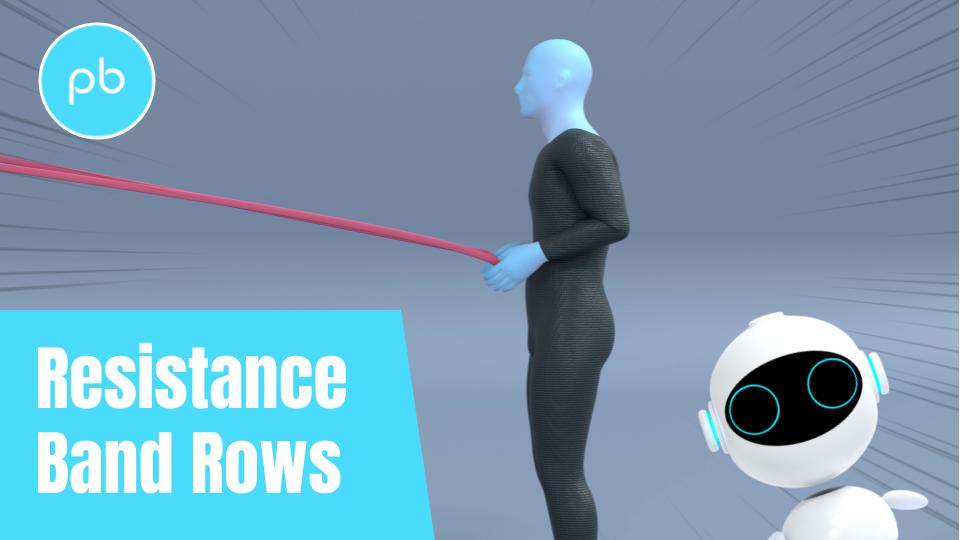
| Resistance band rows | 15-15 reps x 4 sets | 2 x daily |
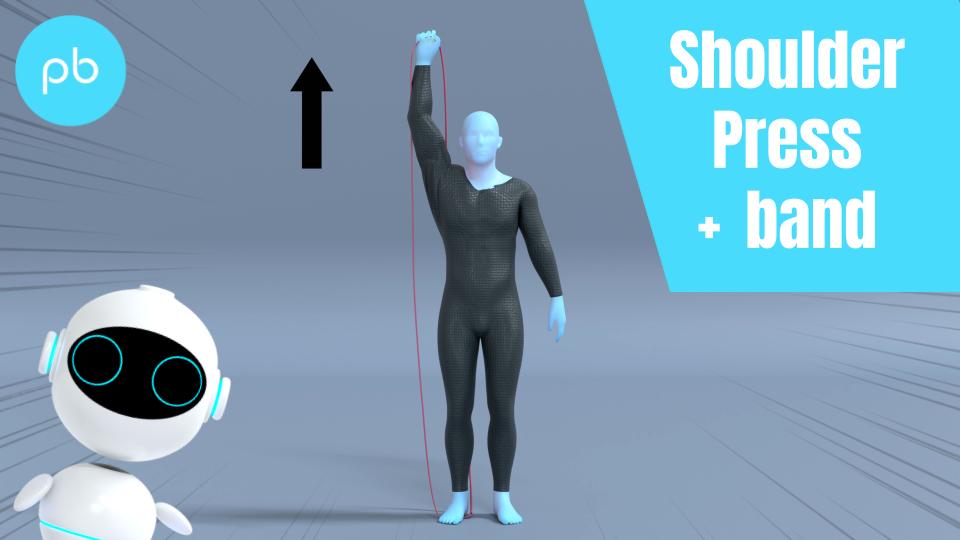
| Resistance band shoulder press | 15-15 reps x 4 sets | 2 x daily |
Some points to consider with the exercises.
- All the exercises should be performed in a slow and controlled manner.
- For the internal and external rotation exercises, it can be helpful to put a rolled up towel between your arm and your torso so that your arm stays in the correct position.
- The final exercise may be the hardest, so start off with an easy resistance and only increase if it’s pain free. You can also use dumbbells for this exercise instead.
- To make the exercises harder you can use a band with greater resistance, or simply move further away from your anchor point.
- These exercises should not cause a spike of pain, but you may find that there is a bit of discomfort for roughly 30 minutes after exercising, which is OK.
Return to Sport or Activity
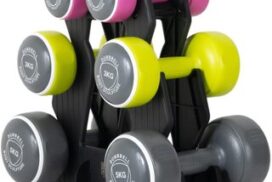
Depending on your sport or activity of choice, you may want to perform some upper body weight bearing exercises such as a plank or press ups. It may also be suitable to do higher level dumbbell strengthening exercises to further increase your strength.
As a general rule, try and aim for two pain-free training sessions at a reduced duration or intensity before increasing.
For example, if you normally play 60 minutes of tennis, aim to play for 30 minutes in a non-competitive environment for two non-consecutive days.
Having a day's rest between sessions allows you to have appropriate rest and for your body to repair and become stronger.
Once you have found a duration or intensity you can tolerate with no flare up, aim to increase the next session by 10%. This can seem like a slow and conservative process however the research has shown this is the optimum level of increase to avoid an overuse injury. Increasing duration or intensity by more than 10% significantly increases your chance of injury, so only increase one or the other by this amount. As you will have been away from your sport for a number of weeks, you will have lost some of your fitness conditioning in this time and will need to build up slowly.
Over time you will be able to slowly return to your pre-injury level of activity without regressing back to any acute flare-up.