This page is split into collapsible sections to help you navigate to the most useful aspects of your rehabilitation programme.
This section covers an explanation of the diagnosis, what's going on within the body, and potential reasons that may have caused the issue in the first place. It gives some context, and helps explain the mechanisms at play, discussing possible lifestyle adjustments to prevent it from coming back.
Each programme is broken down into phases based on where you are in your recovery. Exercise videos will progress from initial, light exercises following injury, to more difficult, strength training as you recover. Within each phase are further drop downs, providing additional information about the phase and other interventions you could try.
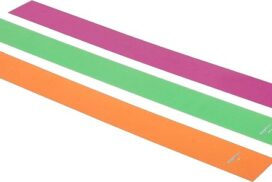
Any equipment listed within the programme is linked within this section. We have hand selected our preferred suppliers of all equipment needed, with links on where to purchase each item; providing a low-cost, quality product to make purchasing online quick and easy.
From the testing you performed it appears you have Achilles tendinopathy. Your Achilles is on the lower part of your leg and attach your calf muscles to your heel bone. Their role is to absorb impact when walking, running and jumping, and help transfer energy during these movements.
Tendinopathy is when the tendon, which attaches muscle to bone, becomes irritated and causes pain when they are put under a tension which is greater than what they can handle. Tendinopathies are generally caused when there has been an increase or change in activity to what the tendon can handle. This is because the tendon can’t adapt quickly enough to this increase or change and becomes irritated causing pain. The question at the start where you answered that the symptoms started after a specific event could have been the trigger to cause these symptoms. From the testing it was shown that you were unable to hold your bodyweight on both sides without it causing pain. The initial pain should settle over the next few days and then the focus will be on loading the Achilles at an appropriate level. It is also not uncommon for there to be swelling at the Achilles after an activity which has caused it irritation. Generally this settles after a few days but the important thing to focus on over the next few weeks is the function of the Achilles and what movements you can perform.
The encouraging thing to remember is that tendinopathies generally recover well when a good rehab programme is followed. Bear in mind that if you are unable in a controlled environment to hold your body weight without discomfort, activities that require this for a longer period such as walking and running may be too much of a struggle right now. The important points to follow with tendinopathies is that after an initial short period of relative rest avoiding the aggravating activity, we need to slowly start loading the tendon again so that we can return to performing all the activities we wish to. Tendinopathies improve with the vast majority of people returning to the activity they want to, but it takes patience and time to make sure the tendon is healed fully without repeated irritation.
Phase 1 (first 24-72 hours)
| Exercise | Reps / Sets | Freq |
| Ankle Plantarflexion | 30 seconds x 2 sets | 3 x daily |
| Ankle Circumduction | 30 seconds x 2 sets | 3 x daily |
This phase is normally the first 24-72 hours after the event that has triggered your symptoms and its aim is to settle any swelling and pain whilst maintaining the range of motion and function you have. You may find the steps in this phase not applicable due to the level of movement and pain you have, or you may find only a number of points helpful. If you have no swelling and full range of movement of the ankle in all directions, you could simply miss this step and start on Phase 2.
RICE stands for Rest, Ice, Compression and Elevation. These steps are helpful for when you have an injury in the acute phase to help reduce pain and assist with the healing process. However with an Achilles Tendinopathy applying compression to the area may be irritable, so this aspect won’t be included.
Rest: You need to reduce the activity level you are performing and let your body have time to heal. The aim here is to pace your activities throughout the day and cut back on anything unnecessary or that particularly increases your symptoms.
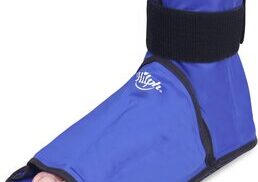
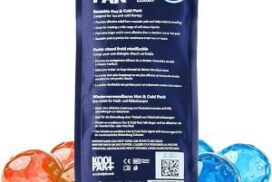
Ice: This can help reduce the pain you are experiencing and also reduce some of the swelling if you have any. Using some frozen peas wrapped in a damp cloth for 20 minutes will work well here and do this every hour or two. Do not apply the ice directly to your skin, make sure you have a barrier which is preferably damp, and keep an eye out for any ice burns onto the skin. If you notice this stop immediately.
What can be helpful here is having a specifically designed ice pack you can reuse over and over again. You still need to have that damp cloth as a barrier with these packs as well.
Elevation: Having your ankle rested on an object and raised above your hip will help reduce the amount of swelling in the area. This may help reduce some of the symptoms you are experiencing. Aim here for a similar time frame as applying ice and go for up to 20 minutes and for your ankle to be at a higher level than your heart. This can simply be achieved by laying down. Do not compress and elevate at the same time, as the volume of fluid returning towards your heart may put too much pressure on it.
In the initial phase the use of over the counter medication may be an option. Medications such as simple pain relief and anti-inflammatories may allow this acute phase to be more manageable. Please consult your family doctor if you have any concerns with this impacting your current medication, or if any medical history may be impacted by the option of including this medication.
As you are able to move the ankle well and also load it to a reasonable level, your aim here is to maintain the movement you have and ensure it is full.
Given the large range of movement available at the joint we have to make sure that all directions are worked on. You may find it helpful to do these exercises in a circuit type fashion, where you do exercise 1 for 1 set, followed by exercise 2 for 1 set, then exercise 3 for 1 set, and then restarting.
Some points to consider with these exercises:
Phase 2 (first 3-6 weeks)
| Exercise | Reps / Sets | Freq |
| Resisted Ankle Plantar Flexion | 15-30 reps x 2 sets | 2 x daily |
| Single Leg Balance | 30 – 60 secs x 2 sets | 2 x daily |
| Isometric Double Leg Calf Raise | 15-20 reps x 2 sets | 2 x daily |
This would be roughly the first 3-6 weeks of your recovery.
The aim here is to start loading your Achilles tendon progressively. Tendons love load but it needs to be the right level for what they can tolerate for that period of time. You want to reintroduce load to the tendon and progressively load it so it can tolerate more. This ability to tolerate more load will mean you can perform more tasks day-to-day and eventually return to your sporting or daily activity of choice.
Tendons can take up to 12 weeks to repair and in some circumstances longer, depending on the severity and also the individuals specific activities they want to perform. Whilst you are rehabilitating your tendon you need to be cautious not to overload your tendon and cause a spike in pain and also irritation to the tendon. This may result in a backward step and delay in your recovery. Equally important is not loading the tendon enough. It is a balance to create and unfortunately you won’t get it right every time, however as long as you don’t keep getting it wrong, and each week you are loading the tendon more, then you are heading in the right direction.
You will hopefully start to notice as well that any swelling that you had in the Achilles area starts to settle as you are not irritating it as often. Do not be too concerned with the swelling as long as your function continues to improve in this period. Try and avoid the temptation as well to repeatedly poke and massage the tendon as this could potentially irritate it further.
The next question you need to start asking is “why did this occur?”. This is really important so you can understand what you did to trigger such a reaction. Sometimes this can be really obvious but other times it needs a bit more thinking. If you play a specific sport, have you increased the frequency per week of doing this sport, the length of the session, or the intensity of the sessions? Did you recently change any equipment or technique? Equally some basic DIY or home activities can cause tendinopathy, even something as simple as going for a long walk or up and down the stairs more than normal. If you aren’t used to doing the activity and suddenly introduce it into your daily life, your tendons may not have time to adjust to the demands required of them.
The ‘why’ is important so that we can adjust things accordingly when we return to the activity and make sure we don’t repeat the same thing.
You can continue any exercises from the previous phase but you may find they have less value as you progress through your rehabilitation.
You want to make sure you get full range of motion and not to over do things initially.
From the testing you performed you struggled when trying to load your bodyweight across both legs. It is important we have an intensity of the exercises appropriate for what you can handle at the moment. It would be beneficial to reduce the load slightly initially and then gradually build up.
Another benefit of performing exercises which are hopefully relatively easy, is that it allows some time for any irritation in your Achilles to settle whilst it still gets some load through it. The evidence has shown that after a short period of rest, you want to load a tendon at an appropriate level to help with the healing.
The aim of these exercises is to introduce some basic strength work. Remember to start off easy and only increase the intensity each week once the symptoms have settled.
Traditionally with Achilles tendinopathy you would perform the calf exercises eccentrically only. This means you focus on the lowering down portion of the movement, where your Achilles is lengthening under load, and do not perform the upwards movement on the affected leg. The evidence on performing the exercise focusing just on the eccentric movement is good, where it has been shown to give better outcomes than doing both the up and down aspects of the movement. However, you do still get a positive change from doing the up and down movements, with the difference minimal in terms of outcome. It is also easier from a coordination point of view to perform, and in our experience people adhere to them more than those who have to do purely eccentric exercises.
So in the programme below if you wish to do eccentric loading wherever you see a calf raise exercise you can do, with no change in reps or sets needed. But equally, if you do not wish to, then you can perform the up and down movements of this exercise, and you can be rest assured that you will still get a positive outcome from the programme.
Some things to consider with the exercises:
You should expect to see the usage of medication reduced as you move through this phase. If you require medication to get you through the exercises, or immediately afterwards, perhaps you need to reduce the reps or duration of some of the exercises so that it becomes a little easier.
The evidence for acupuncture is poor in improving healing time for Achilles tendinopathies. It can increase blood flow to the area which can help with the healing process, but so does performing the exercises we have mentioned. There is some evidence of improving pain, so it may be an option if that is your limiting factor and you have tried other options to reduce your pain without success. However, using acupuncture on its own is unlikely to improve symptoms, as a tendon’s job is to absorb load, so any passive treatment is not going to help with this.
Similar to acupuncture, massage on the calf muscles may help blood flow to the area and offer temporary reduction in tightness to the area, however similar effects can be generated with simple movement and stretching. You also do not want to massage an irritated tendon as the evidence on what this is doing, and the effect it has on performance is conflicting. The evidence again shows that massage alone will unlikely help with tendon performance, but used alongside an exercise programme can help reduce symptoms.
A treatment choice for tendinopathies which has been used for many decades is therapeutic ultrasound. Ultrasound uses sound waves with the aim to improve the healing of the tendon by causing very small pain-free vibrations, and ultimately promote blood flow to the area. Traditionally this treatment would be administered by a therapist for about 20 minutes with the patient receiving a number of sessions per week. Unfortunately the evidence for this treatment is poor, and is slowly being phased out of any reputable therapists treatment options. Patients have the perception that this treatment is effective but in reality the passive nature means it is just an easy option, compared to doing the exercises, which have the best evidence for improvement. Therapists like using this treatment option because it’s easy, they can charge for administering it, and sometimes it helps the patient feel they are getting a modern form of electrotherapy. Be cautious of any therapist offering you ultrasound and charging you for the service.
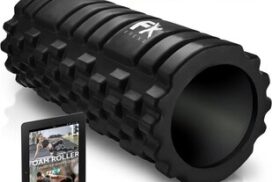
A foam roller is used to offer self massage. They are marketed as a way to get similar results of a massage but without the reliance of a masseuse, making it more practical and cheaper for people to use. They are very popular within the fitness industry and with a lot of professional athletes using them within their warm-up and rehab routines. The idea is that similar to massages they increase blood flow to the area and also help with mobility by reducing muscle tension. Unfortunately the evidence on them having an effect on muscle length is minimal, and any change is short term, and the link that they reduce injury or improve rehab times is simply missing. Again similar to acupuncture and massage, a foam roller can be used alongside an exercise programme to help with symptoms, but used on its own will not improve tendon performance.
There is an option to apply some strapping on your Achilles tendon which may help reduce your symptoms when performing the exercises, or to be used on certain activities which cause irritation.
A video on how to apply this tape can be found here.
Similar to some of the other treatment options highlighted above the strapping won’t increase the strength of the Achilles but reduce the symptoms it generates. The tape is called ‘Kinesio Tape’ and helps support the muscles and tendons in that area, and stretches with the movement. You can leave this tape on for a number of days but if you have particularly sensitive skin it could cause irritation. It may be helpful to put a small trial patch somewhere visible to monitor for a day or two before applying. If you do get a reaction, remove the tape immediately.
During this phase you should start noticing more times in the day when you are pain free, however it is not uncommon for there to be sharp spikes in pain if you are doing a specific activity. This will improve and the activities which cause irritation should become less. If you continue to perform activities which consistently aggravate the Achilles, it will continue to cause you pain and perhaps be affecting the end stage of healing. You need to alter the activities in some manner that are causing irritation until you have moved further along in your healing, and increased the strength in your Achilles.
If you are struggling to wean off medication or perform the exercises in this phase it may be helpful to be reviewed by a medical professional to ensure you are on the right path. If they confirm it is an Achilles tendinopathy then you can continue on the phases in this rehab programme.
During the rehabilitation programme you may find that specific exercises or activities of daily life aggravate the tendon and you become sore for a couple of hours after. This is ok as long as the pain is below 5/10 on the pain scale, and as long as it settles within 2-3 hours. If you are sore for the rest of the day, or particularly sore and limping the next morning this means you have done too much for that Achillies tendon to cope with at this stage. When it becomes irritable and painful like this, sometimes applying the treatment options and exercises in Phase 1 may be helpful. It’s important that you don’t keep repeating activities which result in a spike in pain as this will prolong your recovery.
Phase 3 (6-12 weeks)
| Exercise | Reps / Sets | Freq |
| Isometric Single Leg Calf Raise | 15-30 seconds x 4 sets | 2 x daily |
| Single Leg Sit to Stand | 8-15 reps x 4 sets | 2 x daily |
| Double Leg Calf Raise | 10-20 reps x 4 sets | 2 x daily |
In this phase we are looking at between 6-12 weeks following the injury or start of your symptoms.
Similar to Phase 2 the timelines here are merely a guideline and may vary. You may find that you are able to start this phase before 6 weeks if the symptoms have settled and you aren’t challenged by the exercises.
The aim of Phase 3 is to increase the intensity of the rehab exercises, specifically the Achilles tendon loading exercise. You should now be looking at returning to full daily activities and depending on the severity of the tendinopathy and your chosen hobbies, a return to sport also.
You should at this stage have full range, be able to perform the exercises from Phase 2 with ease, and not reliant on any pain medication to perform tasks.
For the vast majority it may be the case that we need to improve the strength of our Achilles for some very specific day-to-day activities related to a hobby or our work. Others may have a specific long term goal in mind, such as returning to running or another lower limb activity.
Traditionally with Achilles tendinopathy you would perform the calf exercises eccentrically only. This means you focus on the lowering down portion of the movement, where your Achilles is lengthening under load, and do not perform the upwards movement on the affected leg. The evidence on performing the exercise focusing just on the eccentric movement is good, where it has been shown to give better outcomes than doing both the up and down aspects of the movement. However, you do still get a positive change from doing the up and down movements, with the difference minimal in terms of outcome. It is also easier from a coordination point of view to perform, and in our experience people adhere to them more than those who have to do purely eccentric exercises.
So in the programme below if you wish to do eccentric loading wherever you see a calf raise exercise you can do, with no change in reps or sets needed. But equally, if you do not wish to or it is painful,
then you can perform the up and down movements of this exercise, and you can be rest assured that you will still get a positive outcome from the programme.
The focus on Phase 3 is to move onto single leg loading of the Achilles and also introduce some movement with the Achilles loading. We have also included a general lower limb strengthening exercise to help ensure you have the capacity throughout to perform day-to-day movement.
If you remember the principle of tendinopathy rehabilitation at the start of this programme, you want to progressively load up the Achilles slowly over time with no sudden increases or spikes in intensity or frequency.
Some things to consider with the exercises:
Phase 4 (12+ weeks)
| Exercise | Reps / Sets | Freq |
| Single Leg Calf Raise | 15 – 20 reps x 4 sets | 1 x daily |
| Double Leg Hopping | 5-8 reps x 4 sets | 1 x daily |
The final phase may not be necessary for everyone, however if after completing phase 3 you are finding you are still not able to complete your activities or sport of choice pain free then it may be best to continue, especially if you need to hop or run.
In this phase we are just continuing the process of increasing the progressive load onto the Achilles. By this point you should be able to complete the exercises in phase 3 with good form and no increase in pain.
Some things to consider with the exercises:
As a general rule, try and aim for two pain-free training sessions at a reduced duration or intensity before increasing.
For example, if you normally play 60 minutes of tennis, aim to play for 30 minutes in a non-competitive environment for two non-consecutive days.
Having a day’s rest between sessions allows you to have appropriate rest and for your body to repair and become stronger.
Once you have found a duration or intensity you can tolerate with no flare up, aim to increase the next session by 10%. This can seem like a slow and conservative process however the research has shown this is the optimum level of increase to avoid an overuse injury. Increasing duration or intensity by more than 10% significantly increases your chance of injury, so only increase one or the other by this amount. As you will have been away from your sport for a number of months, you will have lost some of your fitness conditioning in this time and will need to build up slowly.
Over time you will be able to slowly return to your pre-injury level of activity without regressing back to any acute flare-up.
At this stage you should find you can do more day-to-day activities pain free. The temptation here is to go a bit overboard. A nice reminder to pace activities so that you don’t over do it, and that you spread these activities out as much as possible throughout the day.
Before printing or downloading your programme, expand all of the drop down sections that you’d like to capture within your downloaded Full Report. Any sections that are closed will not be downloaded.
The button below will open a print window. Simply save the page as a PDF to have your offline full report, anytime.
This rehab programme spans multiple weeks. Don’t forget to bookmark this page to come back to later.
Physiobot is a free digital tool designed to inform, guide, and educate and not a substitute for professional medical advice, diagnosis, or treatment. Always consult a qualified healthcare professional for personal advice regarding your health, diagnosis, or treatment options. By continuing to use this website and the Physiobot tools, you agree to our Terms of use.